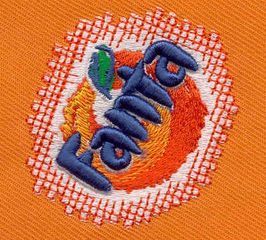
The beauty of a 3D effect on an article of clothing whether a baseball cap, jacket or other apparel is it really stands out – giving your logo or message the best visual experience and showing it off. It is a a luxurious finish that upgrades your item and ensures you are telling the right story for your brand. Creating 3D puff effects is best left to the professional embroidery designers such as Powerstitch as we completely understand the complexities involved in this process and will ensure we create your perfect finish – literally eye-popping!
A 3D puff effect is exactly what it says; is slightly raised giving it a puffier and more generous appearance from the flat surface of the rest of the garment it is being embroidered onto. It adds dimension and exciting interest to a product. 3D puff effects are mainly used on baseball caps (although can be found on other garments) because of the nature of a cap – they tend not to be washed as much as other garments meaning the foam inside the 3D effect lasts longer.
When selecting a design to use with your 3D puff effect, bear in mind simplicity– steer away from tiny details on a logo as they are difficult to foam-fill. There are various processes involved in this method of embroidery digitizing, for those unfamiliar with embroidery it can be difficult to understand, here’s a summary from our own embroidery digitizer.
Specially created foam is used available in varying thicknesses and sizes, expect to find 2, 3 or 6mm. The embroidery digitizer uses a ballpoint needle to make bigger holes than a sharp needle as it is able to puncture foam better. This type of embroidery will need cover stitching but it will be a special satin stitch, using twice as much as a standard embroidered item. This helps with cutting foam and makes up for the foam used beneath the 3d embroidery.
Next is placing on the area you want embroidered with puff effect. As with other types of embroidery, it can be placed on many different areas of a baseball cap and a placement guide is created for the digitizer to show the area to be embroidered. This could be the front, side, back or even brim of the cap in question. Next the piece is tacked with a temporary running stitch (approximately 1.7mm) to hold the design in place. Then the design is ready for permanent stitching but care must be taken that auto-spacing is turned off and the density of the standard stitching for this embroidery increased by up to 60%.
Other things to bear in mind include choosing foam in a colour as close to the thread as possible so that if any pieces are left in, it won’t be noticeable. The foam is removed after the embroidery process. Additionally, if the foam chosen is not malleable, when removed it could tear the stitches. If there are small pieces visible through the final satin stitch, then a needle is used to push it down beneath the thread to try to disguise it. Digitizers also include tie-off stitching about 4 to 6 running stitches of 1mm in length each.
If you are searching for a professional company to undertake this type of embroidery then you always use a reputable service. That’s why at Powerstitch we have a large volume of notable clients returning to us for their 3D puff embroidery. This is testimony to our ability to produce excellent quality – and with nearly 10 years of experience we know what we are doing! We are available 7 days a week and look forward to working with you soon.


